What I Pack for Photography Hikes

Home sweet home. Fangs Pass, Drakensberg.
When hiking for photography there’s no room for non-essentials. My aim is to keep my backpack as light as possible while ensuring I am comfortable and prepared for all weather conditions. Over many years and many hikes, I am still evaluating and improving. Please remember that the region and the season in which you choose to hike will affect what you pack: additional water for drier regions, warmer gear for winter and so on. In this post, I have outlined what I would pack for a 4-day hike in the Drakensberg during autumn, meaning occasional rain with moderate temperatures. What works for me might not work for you. Use this as a basis for building your own kit.
Photographic Equipment
My camera setup is lightweight, versatile while producing exceptionally high-quality images. When hiking for photography, zoom lenses are the most functional choice. Unless you are shooting astrophotography, a fast aperture lens (f2.8) is not necessary, and these are often much heavier than their f4 counterparts.
Sony A7RIII Mirrorless Camera
4 Batteries (x1 Sony, x3 Hanel)
Wide-angle lens: Sony 24-105mm f/4
Telephoto Lens: Sony FE 70-200mm f/4
NISI Natural CPL (one fitted on each lens)
Leofoto LS-248C Tripod
Leofoto LH-36 Ballhead
Sirui L-Bracket
Electronics:
Ledlenser Rechargeable headlamp
RED-E 20000MaH power bank
iPhone charger cable
Micro USB charger cable
iPhone headphones

My Sony A7rIII, Sony 24-105, Sony 70-200 and various electronic items fit into my Lowepro Format 160 bag.
Backpacks and Storage:
Osprey Aether 70l
Lowepro Format 160 (All my camera and electronics go into this bag)
Sea to Summit dry bag 20l (My clothing and camera bag go inside this bag)
Sea to Summit dry bag 13l (For my sleeping bag)
Patagonia Black Hole Cube - Large (I pack the majority of my food in this bag)

Packing my sleeping bag into a dry bag ensures it’s always protected, no matter the conditions.

A selection of gear from 2018. Many items I still use, others have been refined since this picture was taken.
Clothing:
To stay warm and comfortable, you want to layer your clothing, using multiple thinner layers, rather than one thick layer. To read more about layering, check this article out: REI Layering Basics. Always pack a rain jacket and rain pants. My approach is to have one set of ‘outside’ clothes for hiking, and one set of ‘inside’ clothes for sleeping and at camp. My ‘outside’ clothes regularly get wet, but my ‘inside’ clothes always stay bone dry.
Outside Clothing
First Ascent Vapourstretch Rain Shell
Patagonia R1 Pullover Midlayer
First Ascent Core Fit Synthetic T-Shirt
Salomon RS Softshell Pants
RAB downpour waterproof over pants
Salewa GTX Mid boots
1 pair of padded, synthetic hiking socks
RAB Guide Gloves (For colder trips)
First Ascent gloves (For warmer trips)
Generic wide-brimmed hat
Inside Clothing
Patagonia Micro Puff Down Jacket
First Ascent Long Sleeve Shirt
1 pair of wool socks
Synthetic Beanie (Also used outside if it’s cold)

Invest in high quality hiking boots, like the Salewa GTX Mids, and they will last you many seasons.
Camping:
Staying warm, dry, and out of the weather is a top priority. Tents and sleeping bags can be costly, but I advise you buy the best you can afford. The temperatures can drop dramatically in the mountains, and the winds can be ferocious. If in doubt, choose a heavier, sturdier tent over a lighter, more flimsy model. Buy a winter sleeping bag, you can always open the zip if you’re too warm.
Vango Mirage 200 Tent OR First Ascent Helio
JR Gear Insulated Mattress (Spend the extra money and buy an insulated mattress)
First Ascent Ice Nino Sleeping Bag (for winter trips)
First Ascent Amplify Down Light (for summer trips)

When the temperatures drop, you won’t regret having a sturdy tent and warm sleeping bag.

For warmer seasons, the First Ascent Amplify Down Light is an excellent sleeping bag.
Cooking:
Generic Enamel Coffee Mug
1/3 of a kitchen sponge for cleaning
2 Small lighters
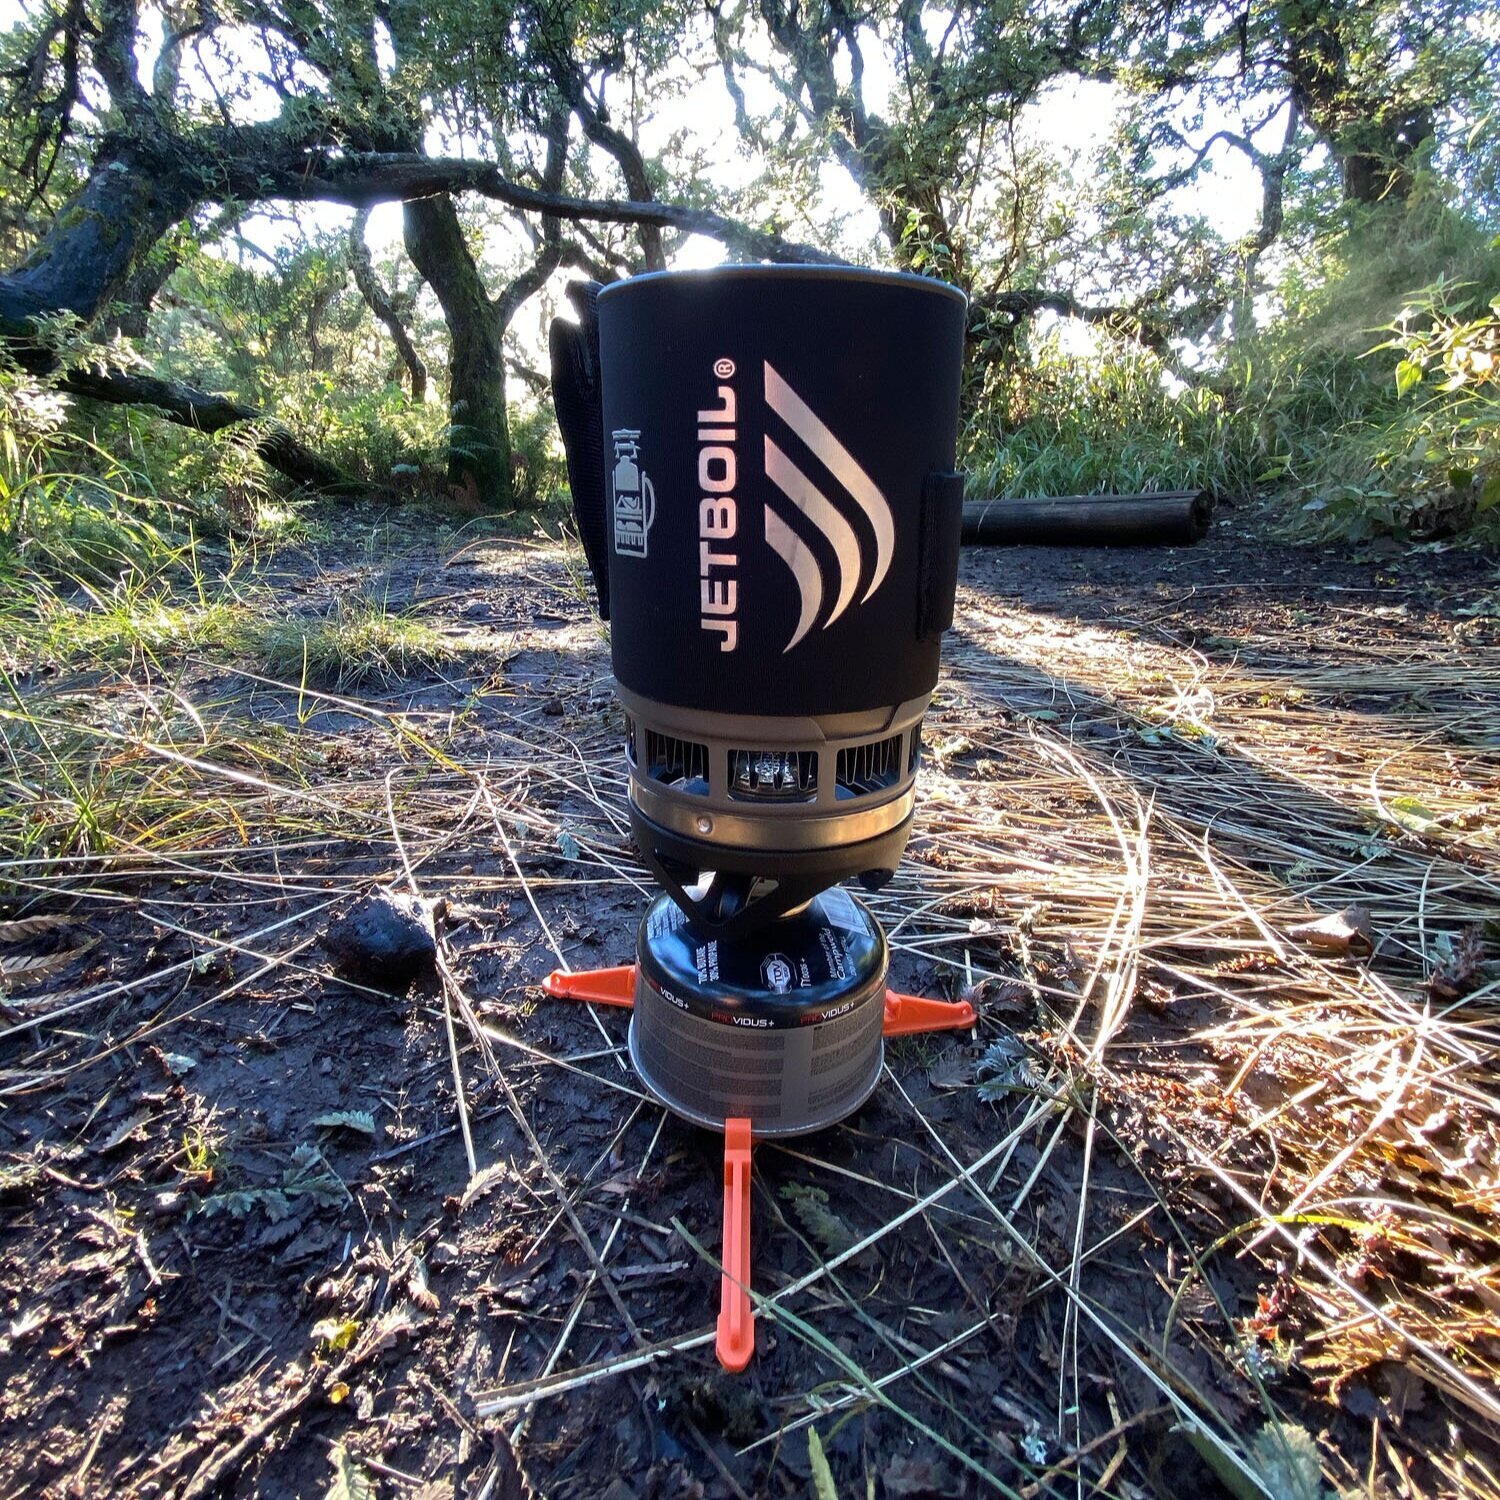
JetBoil stoves are expensive, but if you hike often they are worth every cent.

Before my JetBoil, I used a Fire Maple burner and pot. Simple and effective.
Personal Items:
Small Sunblock
Toothbrush and toothpaste
2 packs of pocket tissues (Don’t bring toilet paper rolls)
Tent Repair Tape (Works on waterproof pants and mattresses)
A detailed map of the area
A Suunto compass
Victorinox Pocket Knife
Essential Medical Kit
Small medical kits bought at Cape Union Mart or Outdoor Warehouse will more than suffice. In addition to these, I add water purification drops, superglue, cable ties, and duct tape. You don’t need a whole roll of duct tape, simply wrap about 1m around a short pencil.
Water
the amount of water needed is highly location and season dependent. For routes with no water, you need to carry at least 2l per day. In the Drakensberg, there is usually water available. Assuming there will be water on the trail, I start a hike with 1l and fill up as needed. Once at camp, it helps to be able to collect 3-4l of water for cooking and drinking. Below are the bottles I carry.
A 3l water bladder
x2 500ml soft flasks
A 1 litre Nalgene bottle

Nuts, seeds, and dried berries are filled with energy making them a hikers best friend.

Soft flasks are lightweight and easy to pack when empty.
Food
Below are the meals I prepare on an average day, as well as foods I bring with me and snack on throughout a hike. I aim for high-calorie foods, like nuts, nut butter, biltong, etc. There are a plethora of dehydrated meals available at outdoor shops, which are a popular (albeit expensive) option. I haven’t listed these as I don’t use them. I snack regularly, on small bits and pieces.
Snacks & General
x2 Instant cappuccino sachets for each day
x1 Pack of SuperC’s (Lasts me 4 days)
Droewors - 2 sticks per day
100g Mixed Nuts
100g Dried Mango
x2 Energy Bars per day
100g Speckled Eggs
200g Peanut Butter
Breakfast Per Day
1/3 cup of jungle oats
x1 Tablespoon of raisins
x1 Coconut Flakes
x1 Chia seeds
Lunch Per Day
X4 Provitas with peanut butter
A few of my snacks listed above
Dinner Per Day
x1 tuna sachet
1/3 cup of couscous
x1 sachet of Nando’s sauce

For shorter trips, like this overnight trip up Cathedral Peak, a home cooked meal is a great idea.

Packing food for a 5-day hike in the Northern Drakensberg.